PROJECT: JEL DEV LOG 02
Weapon JEL Style Experimentation
In trying to establish a unique style for Project: JEL, we've created a special shader for the weapons that will appear in the game. The weapons will be firing JEL, a liquid substance that has unique properties that will deplete as the weapon is fired.
The goal of this shader is to show the type of JEL in the weapon as well as it draining as the weapon is used to show the remaining ammo.
The JEL style will need to be established as it will be used throughout the game on many of the objects, items and characters. As development progresses we expect it will be continually refined to suit these other objects as well.
To start with a base mesh needs to be made, in this example we are using a prototype weapon mesh. The current meshes of the game are still in development and will be shown off in another future blog post so stay tuned!
The weapon has multiple material slots and the JEL material was assigned to the parts of the mesh that would contain JEL.
Most of the material on the weapons are just a flat diffuse colour for now. This works as the model is complex enough to catch the lighting of the Cel-shader. However, this requires a high poly base mesh. As we optimise the model we will need to have details baked in to textures achieve a complex look. This will be elaborated on in a future post. For now we will just elaborate on how the JEL shader works.
A vertex colour gradient was painted onto the mesh in the direction we wanted the JEL to fill up.
The mesh was then imported into Unreal Engine, making sure to also export/import the vertex colors.
The core of the JEL material uses parallax to give depth. The UV input to this parallax is offset by a panning cloud noise texture. This panning noise also has it's own panning UV offset cloud noise. The result creates a warble effect that appears to continually distort and doesn't create any tiling patterns over large objects.
This warbled UV is then fed into a linear gradient and texture to create the base JEL style. This will be elaborated on later.
All of this is fed into a Parallax Occlusion Mapper which offsets a Cloud normal texture to give it a 3D effect when looked at from different angles.
We've created a set of normal texture that each have a hint of the type of JEL that they're trying to portray.
Can you guess which one belongs to which type of JEL?
To finish off the JEL effect we feed this normal into a simple matcap texture. This makes the JEL appear glossy when looked at from different angles. It also allows us to easily create a range of textures that have unique shading depending on the type of JEL.
Again, can you guess which JEL type each of these matcap textures belong to?
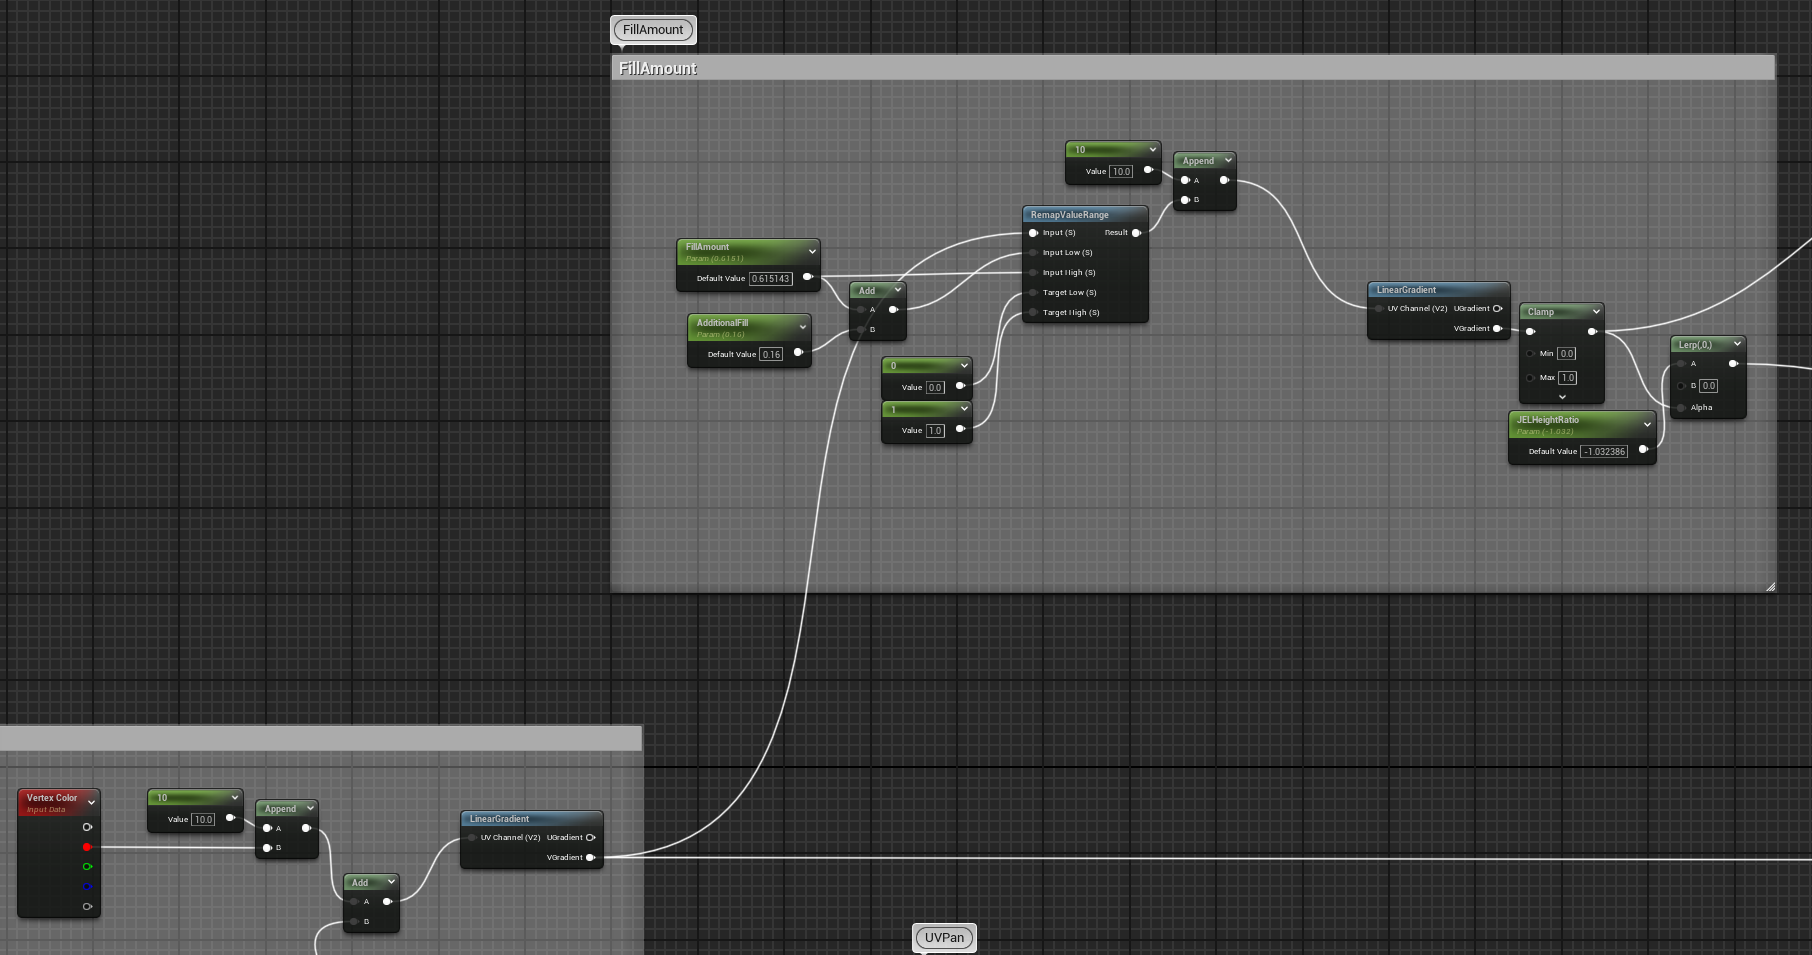
Back to that linear gradient we used earlier. If we remap and clamp the gradient before it's put into the parallax then it will appear to drain via a basic float paramater. This is mapped to the vertex colors we painted on earlier.
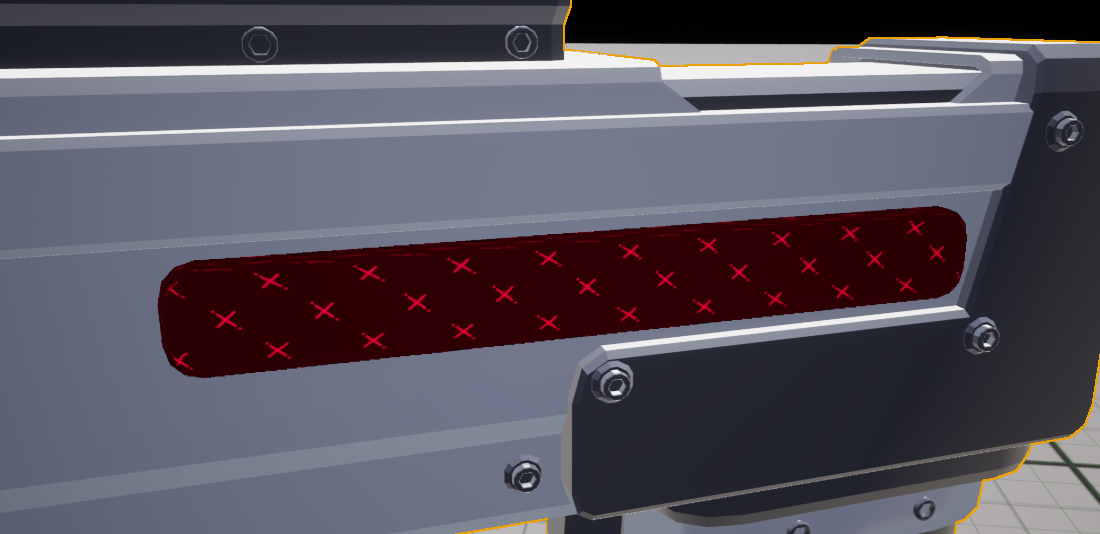
You'll notice the background is made up of a grid of X's. These signify the JEL is empty in those parts and will flash in and out like an alarm to warn the users they're running low. This flashing will increase the more empty it is until it's completely red when totally out. These X's also have a parallax to appear to be in the background behind the JEL when the camera is moved.
Last of all, the top of the JEL is given a very subtle highlight to further sell the pseudo 3D effect.
To finish the effect. Glass windows were extruded from the position of the JEL and a simple glass material was applied here:
One last additional experimental effect that we've tried out for now is to create an outline around the weapon.
The outline is made of a duplicated mesh that has been pushed out and had its normals flipped to only show on the outside.
This allows much thinner outlines than post process effects although it adds dramatically to the poly count. To solve this the outline mesh can be decimated to reduce its count without a noticeable difference in fidelity.
This effect isn't perfect and will need to be refined if it's used in game.
The final result with everything combined
Thank you very much for reading another post about the development of Project: JEL.
Feel free to ask any questions on the official Amythica Discord: https://discord.gg/6jcyUxzyc4
We will be continually making new posts to show off some of the work we're doing in Unreal Engine for our games at Amythica so stay tuned!


