Project: JEL Dev log 01
Unreal Engine Lighting Style Experimentation
The current style of the lighting in Project: JEL
With Project: JEL, we are trying to produce a unique art style that will stand out among other games produced in Unreal Engine. One approach is to use a cel shader to imitate a hand-drawn style look as seen in anime and games like Zelda Breath of the Wild or Borderlands.
Examples from Borderlands and Zelda
We have tried experimenting and pushing as far as possible using materials and post process tricks to produce a visually unique result. The style will continually be refined over time as we balance how objects look in context to the whole environment.
We have used a prototype weapon as a template to demonstrate our lighting style on.
The main effect uses two main techniques. A set of custom materials used on the weapon model as well as a post process effect for the cel shaded lighting. For now we’ll just detail the post process effect.
Weapon with default lighting vs mesh with stylised shader
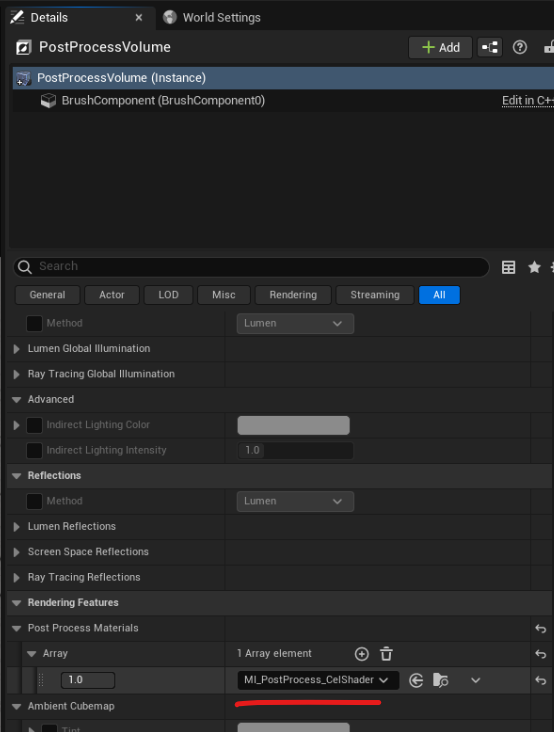
In Unreal Engine you can create custom materials that can be placed inside of post process volumes. These materials can sample the scene lighting, world normals and other render layers and can output a material on top as an additional layer that alters how the final image looks.
As can be seen, many different attempts were made using different techniques to try to get the desired look:
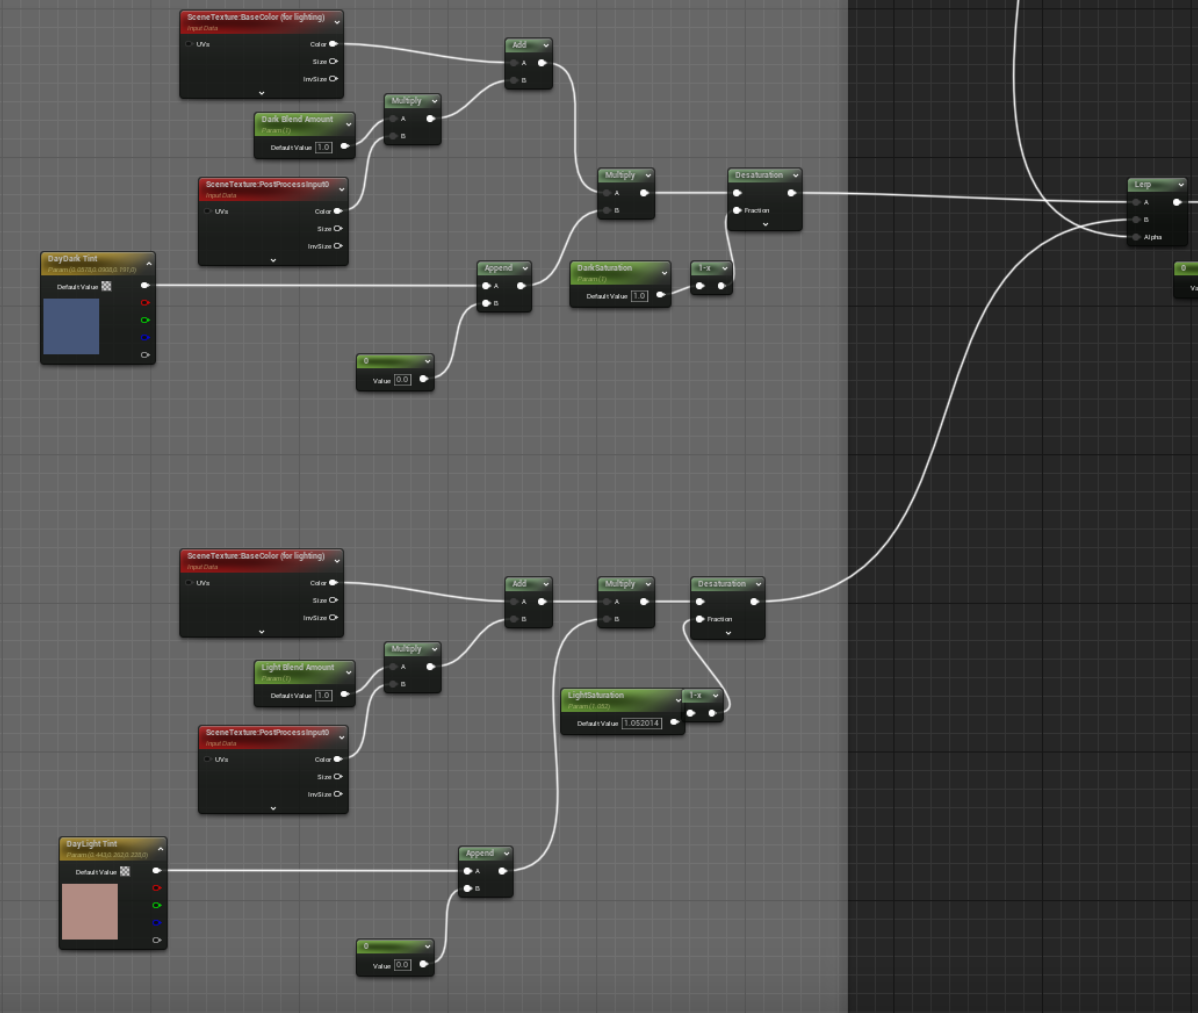
To start with, the default image is divided by the flat shaded base colour. This effectively subtracts all of the non lighting information from the final image and outputs a very simple grayscale mask of all the lighting. This is great since it can work with the directional light as well as as many point lights as you want.
From here, it’s a simple task of clamping the lighting and feeding it into a lerp node. The lerp can then just go into two colour tinted versions of the scene. One for a cool blue shadow and one for a vibrant orange highlight.
On top of this other subtle effects like saturating the edges of shadows are used to enhance the stylized look. We will try adding more of these subtle effects as the game progresses.
The edges of the shadows can be masked out by offsetting the output from the previously used grayscale lighting image. This can be clamped and have the lit areas subtracted from the grayscale image to produce a gradient that goes from the edge of the shadow towards the core of the shadow.
By using this as another mask we can saturate the parts of the image that fall in this area.
This effect produces a similar result to what is seen in many painterly art where the edges of shadows are saturated giving the scene a comforting and inviting look.
Painting Credit to Elizabeth Sherry: https://www.sherryillustration.com/
A very subtle effect that has also been added are very faint comic book style dots within the shadowed areas of the image. This is achieved through simply tiling a dots image and feeding a world normal scene texture into a world aligned texture node to make it ‘stick’ to every surface of the world. Using a world aligned texture prevents the dots from jittering around when the camera is moved.
By default Unreal Engine uses screen space ambient occlusion to darken corners between objects. However, this tends to just decrease the value of shadowed areas. This is unlike stylised art where shadows are usually saturated. To correct this the ambient occlusion can be sampled and used to lerp between a saturated version of the image.
Default vs saturated ambient occlusion
Anything that does not need the effects of this post process material (Skybox, Particles, etc) can be masked out by setting the object's stencil value.
With all effects combined, here is how the model now looks with just a directional light.
With all effects combined, here is how the model now looks with just a directional light
One major benefit to this method is that it is a layer on top of the existing lighting system. This means that dynamic lighting of any colour will appear in addition to the existing directional light without needing any complex material parameter collection setup.
Any combination of point, directional or rectangular lights will work together.
The final result with everything combined
Thank you very much for reading this article. Feel free to ask any questions on the official Amythica Discord: https://discord.gg/6jcyUxzyc4
Stay tuned to keep up to date with more art and programming insight behind Project: JEL as development progresses! 🎨😁


